20. July 2017
On the plan. Precise localisation of defects with docma MM. Automatic room recognition included!
In our article, you can find out how the plan localisation of defects works with mydocma MM and what makes it so smart for you. t.
You are probably familiar with this situation: you have an appointment with a friend, but your date doesn’t turn up. After a while, you reach for your mobile phone and ask ‘Where are you?’.
Recently, you may no longer receive the answer ‘At the moment I’m at the junction of Mühltalstraße and Müllerstraße’, but a map section with a pin. And with just one click, a real friend becomes a digital pin.
Google Maps makes it possible (see u Google blog entry). Whatsapp also allows you to share your current location with friends quickly and easily. The Chip practical tip explains exactly how to do this.
To the chip practice tip ‘Share location’
Localisation of defects
What works with real friends should also work with real defects! We thought so too. And created a smart solution for you to locate defects.
In our mobile app docma MM mobile, you can simply assign a pin to recorded defects. This makes it really easy for your business partners to find defects. The plan sections with the pins are used directly in the defect reports.
How the plan localisation of defects works exactly
Child’s play in just 3 steps. We’ll show you how!
- Step 1:
The first step is to open the mobile application of your defect management system as usual and select a project. Then click on the lightning bolt icon and create a new defect ‘…from plan’.
- Step 2:
Select one of the plans you have stored in the system, zoom in to the corresponding position in the plan where the defect is located and set a pin.
- Step 3:
As soon as you have clicked on ‘Done’, the plan section appears in the defects overview. You can now continue working as usual. Assign a structure to the defect, upload the defect so that it is available in the home system and create your defect display with integrated plan section.
Step 1-3
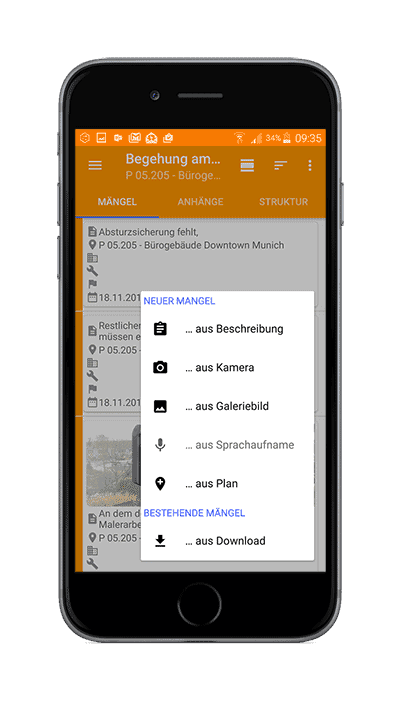
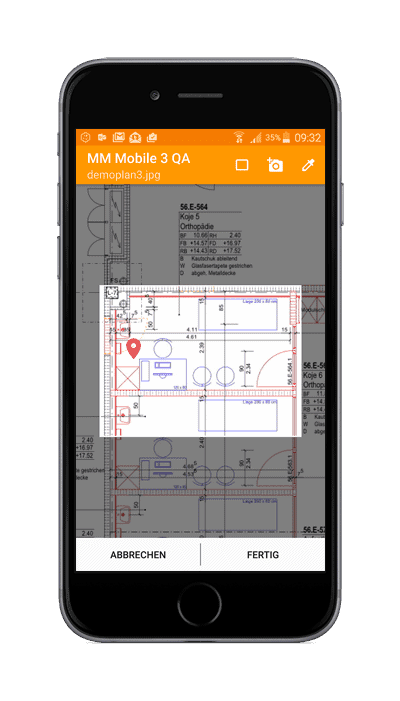
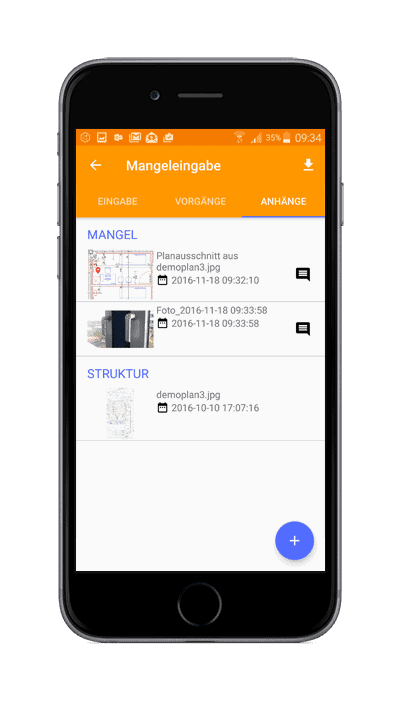
What makes the whole thing so smart for you?
Something you can’t see at first glance – our automatic plan-space recognition.
With a plan section alone, it would be difficult later in the defect management process to create inspection lists by room, for example. Room allocation is therefore mandatory in defect tracking. It’s good that our app learns from you and can better predict which room is meant with each assignment of a room to a pin in the future. If there are already 5 pins with room assignment in a project (either manually assigned by the user on the device or downloaded from the server during the project download), our app then automatically selects the correct room. This saves you valuable time!
Automatic plan-space recognition
The app works with two different algorithms to predict the space as accurately as possible. One method calculates a virtual rectangle over the detected defects, the second method uses the centre of gravity calculation. With an additional bonus and malus system for outliers, the app achieves surprisingly good hit rates.
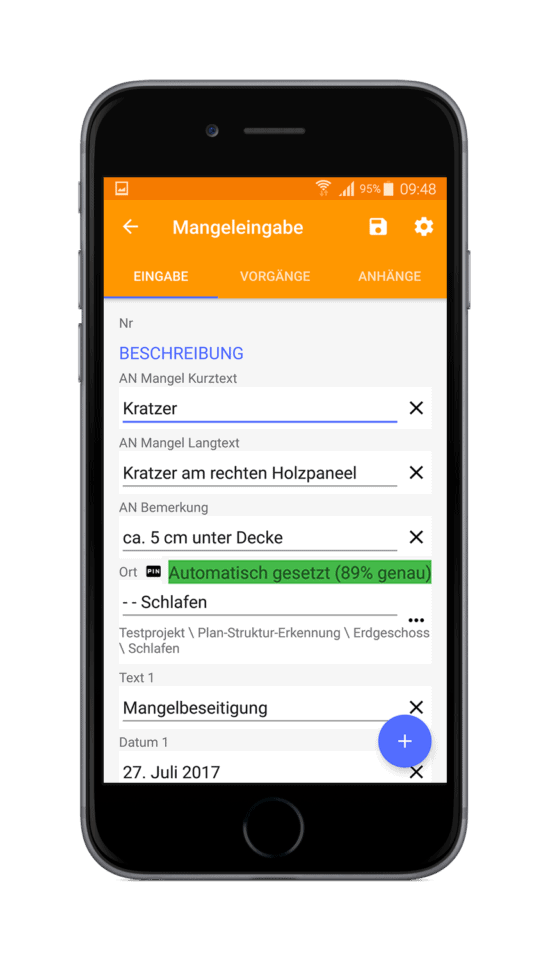
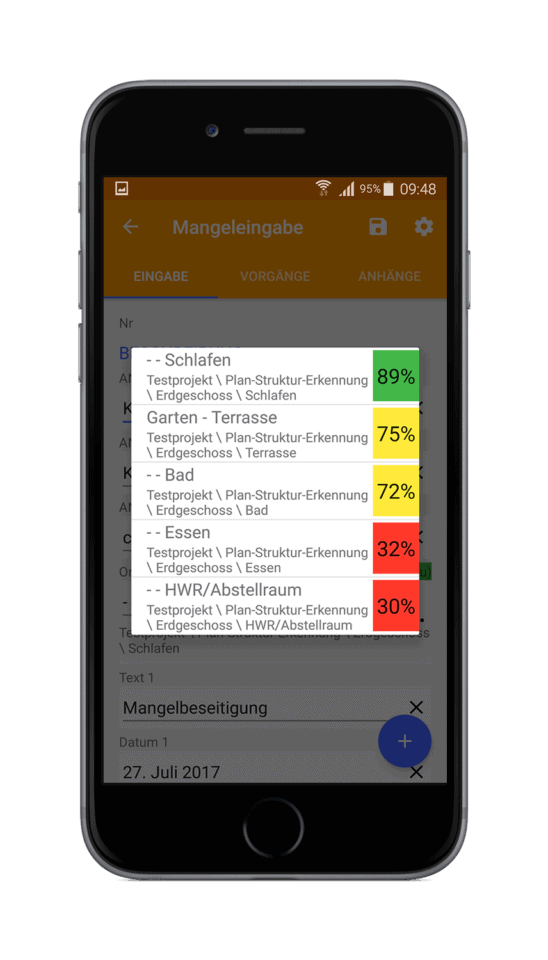
A traffic light system shows you how accurate the mobile app for defect detection is. By clicking on the coloured bar, the rooms in the vicinity are offered for selection.
Try out this clever feature for locating defects during the next acceptance inspection!


